Professional Interview Video Production 101: Get the best out of your interviews
Tips, tricks and 10 creative ideas to level up your interview videos!
25-minute read
Have you been looking for ways to share personal and original stories about your company? Interview videos might be the ideal way forward. These videos are more than just a way to communicate—they’re a platform to promote your brand through the authentic voices of your team, leadership, or customers. In this guide, we’ll explore the essentials of creating impactful interview videos—from pre-production to editing—and even dive into creative approaches that can take your interviews to the next level. Whether you’re new to video production or seeking to elevate your strategy, this is your complete guide to mastering interviews.
In this article
The Art of Interview Video Production
So, what exactly are interview videos? Simply put, they are a type of marketing video where individuals—whether your CEO, staff, or customers—share insights, experiences, or messages that reflect your brand’s values. These videos have the unique power to showcase who you are, what you do, and why you do it in a relatable and human way.

Highly produced, quality interview videos of high production value capture your target audience’s attention while creating a positive and lasting impression of your business. They can be tailored for external audiences, such as customers and stakeholders, or used internally to inspire and align your team. For instance, take Netflix’s employee interview series: a simple talking-head format was used to showcase their culture of freedom and responsibility. This polished yet personal style reinforces Netflix’s image as a human, trustworthy, and customer-focused company.
Pre-Production Essentials
Define the Purpose
Every great interview video starts with a well-defined purpose. Ask yourself: what is the primary goal? Are you educating your audience about a complex topic? Building brand awareness? Inspiring action or industry leadership? A clear purpose not only guides the creative process but also informs every production decision, from tone to visuals. Knowing the “why” behind the video allows you to tailor its content and style to achieve the desired outcome.
Choose the Right Interviewees
The success of your interview largely depends on choosing the right person to sit in front of the camera. If the purpose is to educate, select a subject matter expert or an industry thought leader. For brand awareness, a well-known spokesperson, such as a celebrity or influencer who uses your product, might be ideal. The key is to select someone directly involved in the project or situation and capable of articulating their thoughts clearly. Avoid relying on third parties with secondhand accounts, as firsthand perspectives provide the authenticity and authority your audience expects.
Get to Know the Interviewee(s)
Building a connection with your interview subject beforehand is invaluable. Conduct a pre-interview or gather background information about the person to help put them at ease. Learn about their role, why they were chosen for the video, their involvement with your organization, and even their hobbies or interests. This preparation helps create rapport, making it easier for the subject to feel comfortable in front of the camera. Additionally, be available to answer any questions they may have about the process. Remember, a relaxed interviewee often provides the most natural and impactful responses.
Conduct Research
A well-prepared interviewer can make or break the conversation. Before the interview, invest time in understanding the topic and the interviewee’s background. This research will help you craft intelligent, relevant questions and engage in meaningful dialogue. Familiarity with the subject matter also builds credibility and ensures the interview stays focused on its goals.
Script Open-Ended Questions
Open-ended questions are key to eliciting detailed, thoughtful responses. Focus on “what” and “how” prompts, such as: “What inspired you to join this project?” or “How does your role impact the organization?” To encourage emotional depth, include questions like, “How did that make you feel?” or “What was the most surprising outcome?” As you script these questions, envision the answers you might receive and ensure they align with the messaging goals of the video. Adjust questions as necessary to guide the conversation toward impactful sound bites that enhance your storytelling.
Technical Setup for Interviews
Preparing Microphones for Crystal-Clear Audio
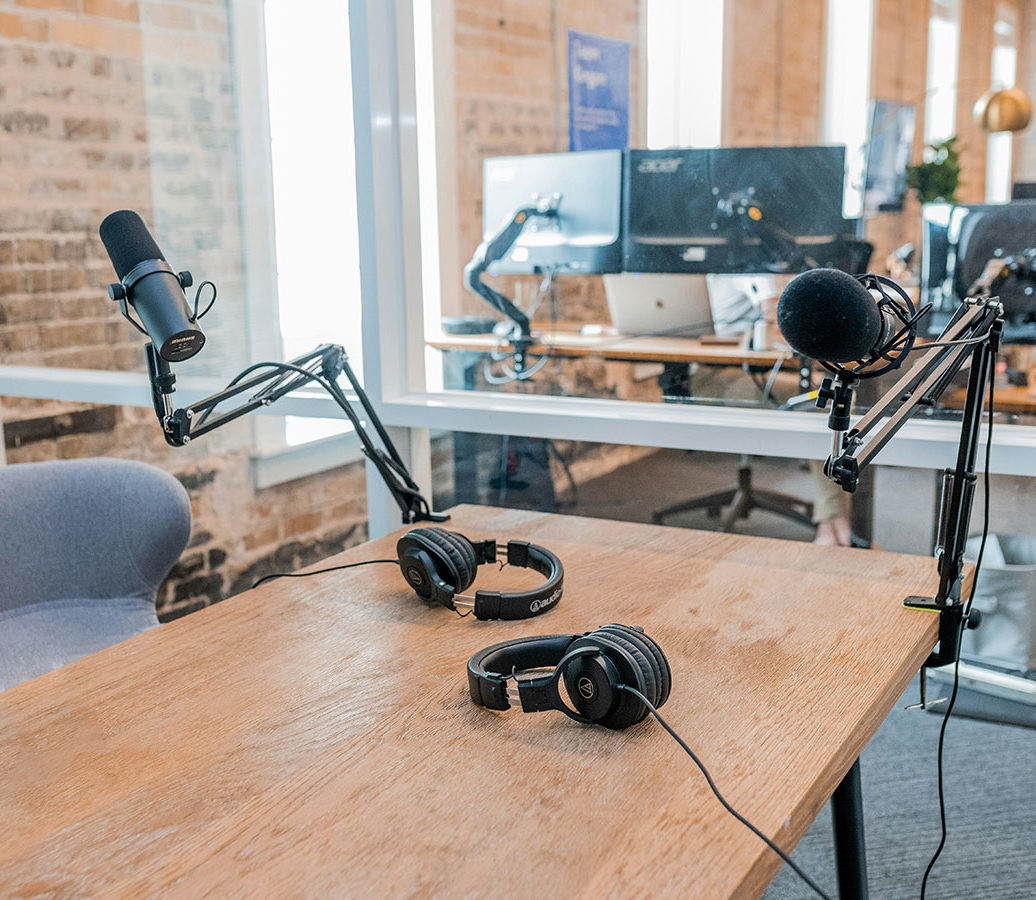
Audio is arguably the most critical component of an interview. Without clear sound, even the most compelling visuals will fall flat. Selecting the right microphone depends on the format and location of your shoot. Ensure the mic is placed correctly to avoid muffled or distorted sound. For lavalier mics, clip them around chest height, ideally a few inches below the collarbone, and position them away from clothing that could cause rustling. Conduct a sound check before recording to identify and eliminate any background noise.
Key Considerations for Microphone Selection:
- Type: Decide between dynamic and condenser microphones. Dynamic mics are durable and often preferred for noisy environments, while condenser mics are more sensitive, capturing crisp, nuanced sound in controlled settings.
- Style: For interviews, lavalier (lapel) mics are ideal for seated, on-set interviews as they’re discreet and easy to position. Handheld mics work well for man-on-the-street or live-style interviews. A boom mic is a great alternative for podcast-style setups.
- Connection: Choose between USB for simplicity or XLR for professional setups requiring audio interfaces.
- Polar Pattern: A cardioid mic captures sound from the front while rejecting noise from the sides and back, making it a reliable choice for interviews.
Microphone Recommendations:
- Rode VideoMic Go: Great for in-person interviews when mounted on a camera.
- Rode VideoMic Me: A compact option for mobile phone recordings.
- Sennheiser ME 2 Lavalier Mic: Excellent for hands-free, professional audio.
Selecting and Positioning Cameras
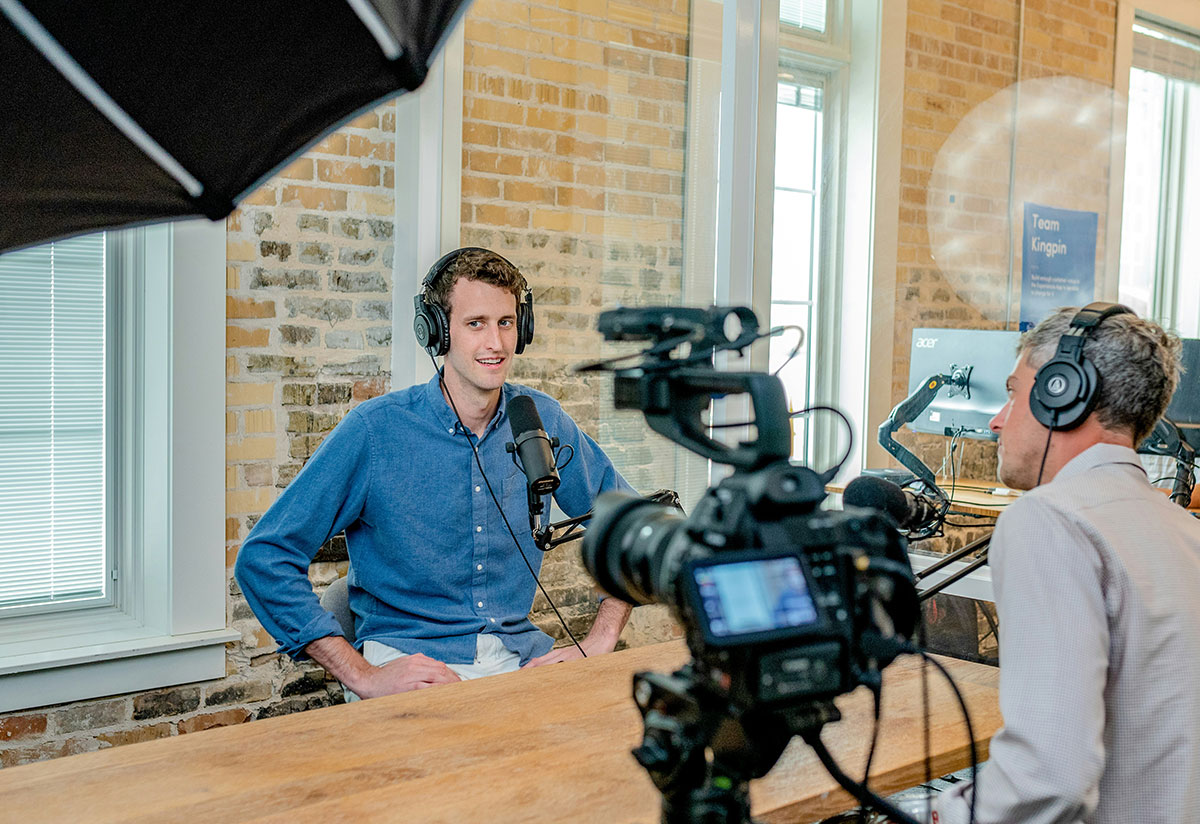
Your choice of camera impacts not only the visual quality but also the overall feel of the interview. Whether it’s a webcam for remote interviews or a professional camera for in-person setups, matching the equipment to your goals is essential. Deciding between having a single camera and having multiple is also important. With one camera, you will be more limited when it comes to framing as well as editing. If you’re filming with one camera, you might want to invest in a 4k camera or higher, to be able to zoom in for some shots in post-production.
Choosing the Right Camera:
- Resolution: Most modern video cameras offer at least 1080p resolution (Full HD), which is more than sufficient for most interview videos. If you want to future-proof your content, you might opt for a 4K camera, especially if you plan to crop or reframe the footage in post-production.
- Sensor Size: A larger sensor will give you better low-light performance and a more cinematic, shallow depth of field, which is great for keeping the subject in sharp focus while softly blurring the background. Cameras with a full-frame or APS-C sensor tend to produce better-looking results than those with smaller sensors.
- Autofocus and Manual Controls: While autofocus can be convenient, it may not always be reliable, especially if the subject moves or if there are multiple subjects in the frame. A camera with manual focus and full control over settings (shutter speed, aperture, ISO) will provide greater flexibility.
- Portability and Stability: For static interview setups, you’ll need a camera that can be easily mounted on a tripod. Look for cameras with solid tripod threads (1/4-inch or 3/8-inch) for a stable shot. If your setup requires moving shots, a gimbal or handheld rig may be necessary.
Setting Up Multiple Cameras for Coverage:
- Primary Camera (Wide Shot): This camera will be the main shot, showing the interviewer and subject from a medium or wide angle. Position it in front of the subject, at eye level, for a natural perspective.
- Secondary Camera (Close-Up or Two-Shot): A secondary camera can capture a close-up of the interviewee or even a two-shot (both the interviewer and subject in frame). This shot adds variety and engagement to the video. Place this camera at a 45-degree angle to the subject, ideally in a position where you can catch the subject’s reaction without crossing the line of sight.
- B-Roll Camera (Optional): For a more dynamic edit, use a third camera or even a mobile device to capture cutaway shots (known as B-roll). This could include details like the interviewee’s hands, the interviewer’s reactions, or any relevant environmental shots that enhance the narrative.
Camera Settings for Interviews
- Shutter Speed: Set your shutter speed to approximately double your frame rate. For example, if you’re shooting at 24 fps (frames per second), set your shutter speed to 1/48 or 1/50 to achieve natural motion blur.
- Aperture: Use a wide aperture (low f-stop number, such as f/2.8 to f/5.6) to achieve a shallow depth of field. This helps separate the subject from the background and gives a more cinematic look. If you’re using multiple cameras, ensure consistent aperture settings for a smooth transition between shots.
- ISO: Keep your ISO as low as possible to minimize noise in the video. Adjust the ISO depending on your lighting conditions, but try to stay within a range that keeps the image clean and crisp. If you’re shooting in low-light conditions, a camera with good low-light performance will be essential.
- White Balance: Set the white balance based on the lighting in your environment to avoid unnatural color casts. Use either the camera’s auto white balance or manually adjust it for more control.
Options for Different Interview Types:
- Remote Interviews: A high-quality webcam such as the Logitech Brio delivers crisp 4K HDR video, ensuring a polished look even in a virtual setting.
- In-Person Interviews: For cinematic quality, invest in a mirrorless camera like the Canon EOS R6, which offers superior low-light performance and vibrant color reproduction.
Setup Tips
- Framing: Position the camera at eye level to ensure a natural and engaging frame. For a seated interview, center the subject with enough headroom (space between the top of their head and the frame) while leaving some room for dynamic framing. A slight angle, rather than a direct front-facing shot, often creates a more visually appealing composition.
- Tripods and Stability: Shaky footage is a surefire way to distract your audience. Use a sturdy tripod to keep the camera stable and at the desired height. For dynamic interviews that involve movement, consider using a gimbal or stabilizer to maintain smooth footage. Be careful that your tripods and other supporting equipment are stabilized and held down with weights or weight-bags. Make sure they are capable of holding the weight without falling apart!
- Backgrounds: A clean, uncluttered background keeps the focus on the subject. You can use backdrops, natural environments, or elements of the workspace that are relevant to the story. Avoid overly busy or distracting setups.
- Seating: Comfortable, non-squeaky chairs are essential, especially for long interviews. Ensure the seating height complements the framing of your shot.
- Managing Remote Interview Setups: For remote interviews, preparation ensures your subject looks and sounds their best. Provide guidance on lighting, camera placement, and how to minimize background noise. Encourage them to use a headset or external mic for improved sound quality.
- Pro Tip: Platforms like Zoom, Skype, or dedicated recording software such as Riverside.fm or Zencastr can help you capture high-quality remote footage with minimal hassle.
Testing and Adjustments:
- Check microphone levels and clarity by recording a sample.
- Review camera framing and focus to ensure the subject is centered and sharp.
- Scan the environment for potential noise or visual distractions, making adjustments as needed.
- Confirm that all batteries are fully charged, and consider having backups for microphones, cameras, and lights.
- Once the setup is complete, sit in the subject’s position to evaluate the shot from their perspective. This ensures that everything—audio, video, and overall composition—aligns with your creative vision. Communicate with your subject about the process, helping them feel at ease and ready to deliver their best performance.
- By carefully setting up your equipment and optimizing the interview environment, you’ll be well on your way to producing a professional, engaging video interview that captures your audience’s attention.
Setting Up Lighting
Three-Point Lighting for Single Subject Interviews
The classic three-point lighting setup is perfect for most interview scenarios, providing well-balanced illumination on your subject. In this setup, the key light, which is the brightest, is positioned slightly above eye level and at a 45-degree angle from the camera, directed toward the subject. The fill light, a softer, dimmer light, is placed opposite the key light at the same 45-degree angle, slightly above eye level, to soften shadows without overpowering the key light. Finally, the backlight, placed behind the subject and higher than their head, creates a rim of light around their hair, adding depth and separating them from the background. This setup is versatile and works well for both formal and casual interviews, and adjustments can be made based on the subject’s features, like using a stronger backlight for light-haired individuals to add contrast.
Three-Point Lighting with a Background Light
For a more polished, cinematic look, adding a dedicated background light to your three-point lighting setup can elevate the scene. This fourth light is focused on illuminating the background, creating visual interest and depth. You can use a simple white background light, or get creative with gels to introduce color, adding mood and atmosphere. For instance, a cool blue light can evoke a calm, professional feel, while a warm orange light might evoke comfort or warmth. Adding a “cookie” (a cutout shape placed in front of the light to create texture) or flags can further shape and control the background lighting, allowing you to tailor the look to your vision. This setup works especially well in narrative-driven interviews or when you want the background to feel as dynamic as the subject.
Three-Point Lighting for Multiple Subjects
When you’re interviewing two subjects, you can adapt the three-point lighting setup to accommodate both individuals while keeping the lighting consistent and flattering. One key light can serve as the main light for both subjects, with each subject positioned to receive a soft fill from the key light. The roles of the key and fill can be swapped, with one subject receiving the key light and the other subject using the light as a fill. To ensure even lighting for both subjects, introduce an additional large, diffuse fill light, such as a softbox, placed in front of both individuals. This will help soften shadows and create a balanced, well-lit shot for both parties. Always remember to check your setup through the camera to confirm that the lighting looks as good on screen as it does to your eye in the room.
Key Light with Reflector and Background Light
Another popular and highly effective setup for interviews is using a key light with a reflector as a fill light, accompanied by a background light. The key light remains the primary light source, while the reflector is used to bounce the light back onto the subject, filling in shadows and creating a more natural, even look. The advantage of using a reflector is that it provides a softer fill compared to a dedicated fill light, making it ideal for more organic setups. The background light, which can be a practical light (like a desk lamp) or a production light, adds a visual separation between the subject and the background, bringing additional depth to the shot. This setup can be further enhanced by adjusting the angle of reflection to avoid spilling light onto the background, allowing you to create a cleaner, more focused shot on your subject.
Top Light Setup
For a dramatic or stylistic twist, consider using a top-lighting setup. This configuration involves positioning a light directly above the subject, angled downward, which casts deep shadows on the face, creating a more intense, cinematic effect. This type of lighting is ideal when you want to convey a sense of mystery or unease, as the shadows play up the contours of the face and emphasize the emotional weight of the interview. However, safety is critical with top lighting, as the light fixture needs to be securely rigged. Use a sturdy C-stand with a Gobo arm or an extension arm, and make sure the stand is weighted down with sandbags to avoid accidents. This setup is perfect for interviews where the subject’s mood or the interview’s tone needs to be highlighted through visual contrast and shadows.
Creative Interview Ideas to Try
Interviews don’t have to follow a rigid format. Mixing up the approach can lead to more engaging and dynamic content, while also better capturing the personality and essence of your subject. Here are some creative interview ideas to experiment with, depending on the style and vibe you want to achieve.
On the Move Interviews
Take your interview out of the traditional studio and bring it to life by filming while on the move. Whether you’re walking through a bustling city, driving around, or exploring a location relevant to the topic, an on-the-go interview can add a dynamic visual element.
This approach keeps the conversation flowing naturally and provides opportunities for B-roll footage of the surrounding environment. It’s especially effective for interviews with people whose work or lifestyle involves being on the move, like athletes, adventurers, or creatives.
Street Interviews
Street interviews offer a raw and authentic look at real people and their thoughts on specific topics. With minimal setup, they allow for a diverse range of voices and opinions, perfect for gaining insights into public perspectives or gathering candid reactions.
Street interviews often give a gritty, energetic feel to the production, so they work well for discussions that aim to capture public opinion or showcase a sense of spontaneity.
Combining Interviews With Other Activities
A more immersive approach involves combining the interview with an activity related to the subject’s story. Whether it’s cooking, painting, or working on a project, this format offers an interesting way to blend personal storytelling with practical demonstrations.
It’s ideal for subjects with hands-on professions or hobbies and can visually showcase their skills or passions. This type of interview creates a multi-dimensional portrait of the subject and makes the content more engaging for viewers.
Remote Interviews and Podcast Style
Remote interviews have grown exponentially in popularity, especially in the podcast world. For a podcast-style interview, consider keeping things conversational and relaxed, with a focus on engaging dialogue. A podcast-style remote interview is an excellent choice for experts, thought leaders, or celebrities who may not be available for in-person filming, offering convenience and accessibility.
Live Interactive Q&A
A live Q&A session takes engagement to the next level by allowing the audience to ask questions in real-time. This format can be used to promote interaction and excitement around the interview, especially on social media platforms like Instagram Live, YouTube, or Twitch.
A live interactive session fosters a sense of community, making viewers feel connected to both the interviewer and the subject. It also creates opportunities for spontaneous moments and real-time reactions, which adds an unpredictable element to the content.
Conversational
Rather than relying on rigidly structured questions, a conversational style interview takes a more free-flowing, relaxed approach. The goal here is to engage the subject in a natural, unforced discussion, often following their lead. By letting the conversation meander, you can uncover unexpected insights and foster a deeper connection with the interviewee. This style is ideal when the objective is to create an intimate, organic experience for both the subject and the viewer.
Talking Heads
Sometimes, simplicity is key. A “talking heads” interview is a straightforward format where the subject speaks directly to the camera. While the style is classic and unembellished, it can be incredibly effective for delivering clear and direct messages. Often used in corporate settings, testimonials, or documentary-style productions, talking head interviews focus entirely on the subject’s message and their expression. However, you can make it more visually engaging with proper lighting, framing, and background choices.
Split-Screen Conversations
A split-screen conversation provides a visually engaging way to show two or more interviewees interacting simultaneously. This technique is especially useful for discussions or debates between multiple people who aren’t in the same location. Split screens allow for clear side-by-side comparisons, showing different perspectives on a single topic. This format works well in panel discussions, debates, or even interviews with people in different locations who can provide varying insights.
Cinematic Interviews
A cinematic interview is all about aesthetics. This style uses high production values, such as dramatic lighting, composition, and slow-motion footage, to elevate the interview into a visually striking piece. Cinematic interviews often focus on the emotional depth of the subject, allowing the visuals to match the gravity of their story.
It’s ideal for profiles, documentaries, or storytelling where the look and feel of the video are just as important as the content being discussed.
Documentary-Style Interviews
A documentary-style interview delves deeper into the subject’s background and experiences, often incorporating archival footage, photos, and storytelling elements that help paint a more complete picture. The documentary interview is less about structured conversation and more about capturing raw, authentic moments.
It’s perfect for subjects with compelling life stories or significant historical context to explore, allowing the subject’s personal journey to unfold in a more narrative-driven way.
Panel Discussions
Panel discussions offer an excellent way to explore multiple viewpoints on a particular subject by bringing together a diverse group of experts, thought leaders, or stakeholders. This format works well for topics that require in-depth analysis or a variety of perspectives. Panel discussions can be moderated or unscripted, but they typically feature a group of individuals engaging in dynamic dialogue, offering viewers a rich, multifaceted understanding of the topic at hand.
Themed Settings
Sometimes, the setting can be just as important as the subject matter. Themed settings take advantage of locations, props, and environments to enhance the interview’s narrative. Whether it’s a cozy coffee shop, a creative workspace, or an urban street, the right backdrop can add layers of meaning and emotion to the conversation. Themed settings can also be used to reinforce a subject’s personality, profession, or passions, helping the viewer connect more deeply with the subject.
By thinking outside the box and experimenting with these creative interview formats, you can breathe new life into your video content. Whether you’re looking to capture raw emotions, engage in dynamic discussions, or showcase your subject’s skills in a unique way, these approaches can help make your interview stand out and keep your audience captivated.
Tips for a Smooth Interviewing Process
Eliminate Distractions
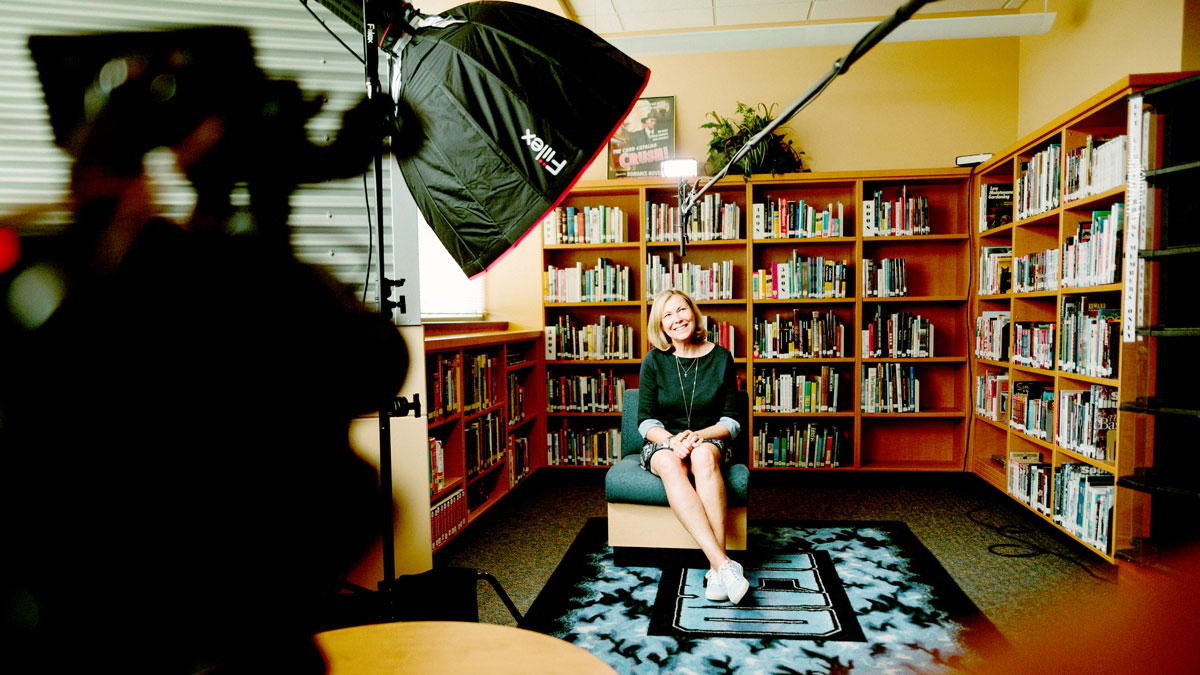
A controlled setting is crucial for a professional interview. Choose a quiet location with minimal background noise and ensure there are no visual distractions. Turn off all phones, unused electronics, and office equipment to avoid interruptions. Pay attention to details such as shadows, unusual lighting, or clutter in the background that could draw focus away from the subject. Limit the number of people present during the shoot to reduce noise and help the interviewee feel less self-conscious. A distraction-free environment ensures your audience can focus on the story being told.
Get Your Subject Talking
Many people become shy when the camera starts rolling. Begin the session with casual “ice breaker” questions to warm them up and put them at ease. Encourage a natural conversation and provide affirming feedback as they speak. If possible, have your videographer start recording during these moments without drawing attention to it—sometimes, the most authentic responses come from these informal exchanges.
Combining Interviews With Other Activities
A more immersive approach involves combining the interview with an activity related to the subject’s story. Whether it’s cooking, painting, or working on a project, this format offers an interesting way to blend personal storytelling with practical demonstrations. It’s ideal for subjects with hands-on professions or hobbies and can visually showcase their skills or passions.
Engage the Interviewee and Reduce Pressure
Help the interviewee relax by being supportive and attentive. Offer them water, maintain eye contact, and show genuine interest in their responses. Be mindful of your body language—an open, relaxed posture encourages trust and comfort. Reassure them that it’s okay to make mistakes and repeat answers if needed; editing will take care of any imperfections. By fostering a stress-free environment, you’ll encourage more candid and natural responses.
Prompt Contextual Response
To make the final edit cohesive, ask the interviewee to start their answers by restating your question. For example, if you ask, “What inspired you to take on this role?” they should respond with, “What inspired me to take on this role was…” Explain that your questions won’t be included in the final video, so providing context in their answers is essential. This technique ensures the sound bites can stand alone while maintaining clarity and flow in the video.
Ask the Right Questions
Crafting and delivering the right questions is essential to eliciting valuable responses. Start with open-ended, warm-up questions to put the interviewee at ease and build momentum before diving into more complex topics. Avoid yes-or-no questions, as they tend to produce flat, unengaging answers. Instead, ask specific, relevant questions to generate detailed and thoughtful responses. For example, instead of asking, “Do you like working here?” try, “What motivates you to work here, and how has your role evolved over time?”
During the interview, be prepared for the conversation to veer off course. While some tangents may offer unexpected insights, it’s important to have predetermined questions to steer the discussion back on track when necessary. Don’t hesitate to rephrase questions or add context if the interviewee struggles to respond.
Ask Follow-Up Questions
Asking follow-up questions can also unlock deeper, more emotional insights that add richness to your video. The best answers often come from spontaneous follow-up questions. Be flexible and attentive during the interview, ready to rephrase or expand on a topic if you sense there’s more to uncover. For instance, if an answer feels surface-level, try framing the question differently to evoke a deeper response. Avoid yes-or-no questions, as they can halt the flow of conversation. Open-ended follow-ups allow for richer storytelling and more emotionally engaging content.
Gather Final Thoughts
Before concluding the interview, give the subject an opportunity to share anything that hasn’t been covered. A simple prompt like, “Is there anything else you’d like to add or share about this topic?” often results in meaningful soundbites that can elevate your video. These final moments are also an opportunity to uncover perspectives or anecdotes the interviewer may not have anticipated. By combining a thoughtful approach with clear objectives, the right questions, and thorough preparation, your interview video can deliver compelling narratives that resonate with viewers and achieve your desired goals.
Post-Production Tips
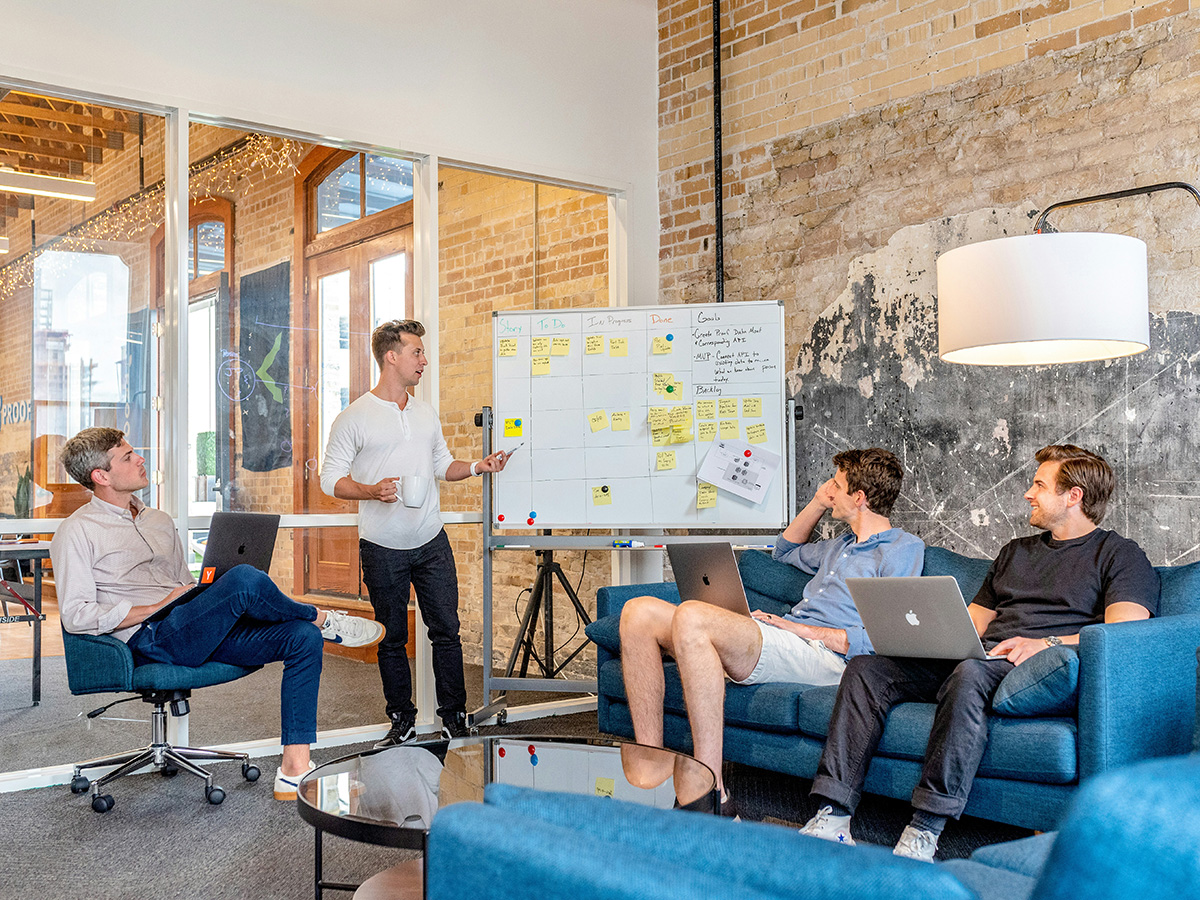
Once your interview has been filmed, the work isn’t done yet—post-production is where the magic happens. Whether you’re editing a straightforward conversation or a more complex interview with multiple layers, there are several key tips that can help you polish the final product.
Organize Your Footage
The first step in any editing process is organization. After importing all your footage, start by labeling and categorizing clips. Create folders for different camera angles, audio tracks, and B-roll. This will make it easier to navigate your project and find specific elements quickly. For interviews, it’s especially helpful to create a rough timeline where you mark key moments—such as important quotes or moments when the subject gets emotional—that you may want to highlight in the final cut. Keeping everything organized will save time when you begin to assemble your edit.
Sync Audio and Video
One of the most common issues in interview footage is syncing audio and video. If you’ve recorded audio separately (with an external mic or a lavalier), make sure the audio aligns perfectly with the video. Use visual or audio cues to match the sound to the lip movement or clapboard signal. Many editing programs like Adobe Premiere Pro or Final Cut Pro offer automatic syncing tools, but always check the sync to ensure everything is perfectly aligned. Clean, synced audio is critical in interview videos since poor audio quality can distract the viewer from the content.
Cut for Pace and Flow
Interviews, especially long ones, can feel slow or repetitive in the editing phase. To keep the viewer engaged, it’s important to cut out any unnecessary pauses, filler words (like “um” or “you know”), and off-topic tangents.
Make sure to maintain the natural flow of conversation, but don’t hesitate to trim down parts that don’t contribute to the main narrative or purpose of the video. Use jump cuts (cuts between different shots of the same person) to remove any awkward silences or non-essential moments. However, be mindful of the pacing—if you cut too aggressively, you could disrupt the rhythm of the interview.
Use B-Roll to Add Context and Visual Interest
B-roll is a valuable tool in post-production because it can add context to the interview and make the final video more visually engaging. If the interviewee mentions something specific, like a location, event, or product, consider adding relevant B-roll that illustrates what they’re talking about. You can also cut away to reaction shots or close-ups to emphasize emotions or key moments. B-roll not only helps in cutting the interview but also in breaking up any monotonous shots, keeping the video dynamic and visually interesting.
Color Correction and Grading
Even if your lighting setup was perfect, your footage might need some color correction in post-production to make it look its best. Start with basic color correction—adjusting exposure, contrast, and white balance to ensure that the colors are true to life.
Afterward, you can move on to color grading, which involves giving the footage a stylistic look to complement the tone of the interview. For example, a soft, warm color grade may be ideal for a relaxed, friendly interview, while cooler tones might work better for a more serious or formal setting. Don’t overdo it, though—color grading should enhance the content, not overpower it.
Add Music and Sound Design
Background music can significantly impact the emotional tone of your interview. Choose music that complements the subject matter—soft, ambient tracks work well for interviews focused on personal stories, while upbeat music may be appropriate for interviews that have a more energetic or inspiring tone.
Be sure that the music doesn’t overpower the interviewee’s voice; adjust the levels so the audio mix remains balanced. Also, consider using subtle sound design elements to enhance the atmosphere—like the sound of a ticking clock for dramatic tension or background noise to give context to a specific location.
Use Text and Graphics Wisely
Adding lower-thirds (text overlays) for introducing the interviewee, their title, and relevant details can help provide context for your viewers. Be sure that the text is clear, easy to read, and doesn’t distract from the interview itself. You can also include key quotes or points that the interviewee makes as on-screen text to emphasize important ideas. However, avoid overloading the video with too many graphics or text, as this can detract from the intimacy of the interview. Keep it simple and clean.
Focus on the Audio Mix
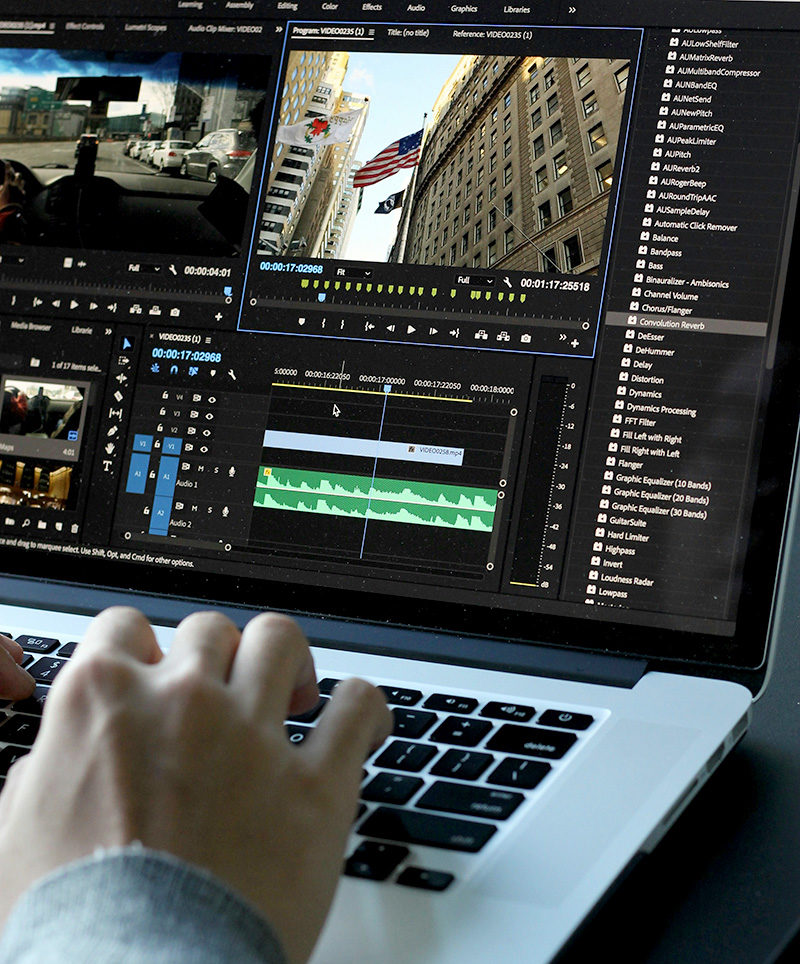
The quality of your audio is just as important as your video. In post-production, make sure the audio is clear, well-balanced, and free from distracting background noise. Use tools like noise reduction, equalization, and compression to clean up the sound.
For interviews, make sure the speaker’s voice is at the forefront, adjusting levels to ensure they’re clear and prominent without distortion. Pay attention to the balance between dialogue, music, and any ambient sound, ensuring that nothing overpowers the main conversation.
Final Review and Refinements
Once you’ve made all the necessary edits, it’s time to sit down and review the entire interview. Watch it from start to finish, paying attention to pacing, transitions, and how well the story flows. Make sure the audio is smooth and the visuals are consistent throughout. If something doesn’t feel right, don’t hesitate to tweak it. Sometimes, a slight adjustment to the timing or a change in the audio mix can make a significant difference in the final product.
Export and Deliver
Finally, once you’re satisfied with the final cut, it’s time to export your video. Choose the right export settings based on how the video will be distributed—whether it’s for online streaming, social media, or internal use. Keep in mind the resolution, frame rate, and file format needed for each platform. Double-check that everything looks and sounds perfect in the final exported version before delivering it to your client or audience.
Post-production is where your interview really comes to life. By following these tips and paying attention to detail, you can turn raw footage into a polished, engaging interview that captivates your audience and delivers your message effectively.
Conclusion
In conclusion, interview video production is an art that combines technical skills with creativity. From the careful planning of pre-production to the seamless technical setup, every step plays a crucial role in ensuring your interview footage engages and resonates with viewers. Exploring creative interview ideas can add a unique flair to your content, whether you’re on the move, combining activities, or capturing remote conversations. Finally, post-production is where everything comes together, as you craft a compelling narrative with editing, graphics, and music. By mastering these aspects, you can elevate your interview videos and deliver an impactful, polished final product.
Fullframe Creative provides a cutting-edge creative communication service: original concepts; clear, creative and concise content delivered competently.
In other words, we help you get your message across through the following tools and services:

- Video Production & Animation – corporate video, social media video, drone, interviews, interactive, video marketing, explainer videos, infographics, motion graphics and lots more.
- Digital & Social Media Marketing – digital concept development & strategy, web & interactive design, campaign strategy, design & management, copy & content writing, blogs & SEO.
- Virtual-hybrid Events & Tours / Video-conferencing – webinars, full event development & management, moderation & hosting, virtual visits.
- Media Training – public speaking & coaching, look & sound great on camera.
- Green-screen Production Studio – large video & photo production studio, 100% soundproof, professionally equipped 360° green-screen.
Fullframe has 15+ years of experience, 100+ satisfied customers and 1,000+ successful productions.
Let’s talk!
Spark up your Image!
Stand out for all the right reasons.
We help you communicate in a clear, creative and comprehensive manner.